Sending Email from DVMAX
Applies to: DVMAX v7.0.12 and higher
Purpose: This document describes the email setup options and explains the options for sending different types emails.
Email Setup
- From the Section pull-down, choose System Constants (may require additional security access)
- Click on Email Reminders
- Under the Server section, enter Outgoing Mail Server information (also known as an SMTP server) and Incoming Mail Server Information (also known as a POP server).
- Outgoing Mail Server information is used to send emails
- Incoming Mail Server information is used to check for bounced emails (emails sent to addresses that are bounced back due to incorrect or no longer in use email addresses).
- Under Options, enter
- From Address - the address you type here is the address from which Email Reminders will be sent
- Reply to Address - the address to which replies will be sent
- E-Mail Subject - the email subject for reminder notifications
- Check off Send Reminders by Email If Possible
- For Troubleshooting or additional configuration information, the following documents have been created
Email Reminders
Clinics have the ability to email reminder cards to clients that choose that option. Refer to Using the Reminder Card Wizard for instructions on the different Reminder Card Wizard Setup Options
- From the Section pull-down, choose Reminders (this option is only available if you are on the DVMAX Main Screen
- Enter date range - DVMAX will search the database for all patients with a reminder due during that time frame.
- Types - choose the types of reminder codes to include in the search
- OK - after all search parameters are selected, click OK. A list of patients matching the search parameters is displayed.
- Green indicates a first reminder will be sent
- Blue indicates a second reminder will be sent
- Red indicates a third reminder will be sent
- Black indicates a patient that has already received three reminders and are still outstanding
- Click OK to print/email reminders (See Email Reminder configuration above for information on setting up reminders to be emailed).
Email Word Processing Documents
Clinics have the ability to email an RTF* version of the word processing document to clients.
*Note: DVMAX v8.8 and higher allows for the ability to email a PDF version of the document.
- From the Client or Patient Word Processing tab, open the word processing document to be emailed
- Click the email icon

- Enter the clinic's email address in the From field
- Enter a client email address in the To field (If there is only one email address option, the address will automatically populate the field). If the patient has referral information listed, and the referral source(s) has an email address, those email addresses, along with the client email address, will be listed in the Choose an Email Address pull-down.
- Enter a Subject and Message
- Click Send
- The word processing document will be sent as an RTF formatted attachment
Sending an Email to a Client or Referral Source
Clinics have the ability to send an email from the client or patient record to the client or referral source. This method uses the default email application on the workstation; the email is not sent through DVMAX.
- Clicking the email icon in a client or patient record will open the default email application on your workstation
- In the patient record, there is an email icon next to the client information and next to the referral information.
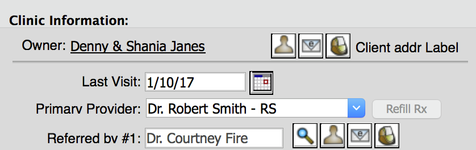
Clicking on the icon in the corresponding area will load the email address related to the appropriate source. If there is no email address on file, a box will open asking the user to enter an email address. After entering the address, the default email application will open.
Email Statements
Clinics have to ability to email statements to clients who prefer to receive email communication
- Client Setup
- In the client General Information, check off E-Mail Statements
- Printing Statements
- From the Section pull-down, choose General Management
- Click on Financials
- Choose Send out Statements
- Click OK
- From the Print or Email pull-down, choose your preferred method of sending statements
- Print - will only print statements for all clients
- Email First and Print Others - will email to clients who have Email Statements checked, and will print statements for all other clients
- Print All and Email Others - will print statements for all clients, and also email clients who have Email Statements checked
- Click OK to generate statements
- Click Confirm AFTER you have confirmed statements have printed correctly