Upgrading to the Current DVMAX Single-User Version from DVMAX v7.6 or higher
Current Version: DVMAX v8.8
This document will outline how to upgrade your DVMAX v7.6 - 8.7 single user application to DVMAX v8.8. This upgrade can be done by the practice or an IT technician and does not require an appointment with the Upgrades Department. If you are using DVMAX v7.5, v7.0.12, or older versions, please refer to our Upgrade Process by Version document.
IMPORTANT
If you are using Remote Processing, please call DVMAX Technical Support (800-950-5455) to discuss specific instructions regarding this upgrade. Remote processing clinics must schedule an appointment with support for upgrade assistance of their remote terminals BEFORE starting the upgrade process. All remote terminals must be available during the upgrade.
If you are an MPA practice, please call DVMAX Technical Support (800-950-5455) prior to upgrading. (All MPA locations must be upgraded within the same 24 hours).
Pre-Install Checklist
We have implemented a new 4D Write Pro Word Processing module so that the DVMAX Client application could be supported on 64-bit operating systems. With this upgrade, there are a few steps you must take PRIOR to performing the steps below.
- Verify that all of your workstations run on a 64-bit operating systems. DVMAX Client will no longer run on a 32-bit operating system.
- Save any logos or pictures pasted into your word processing documents; these pictures may not convert during the upgrade process.
- Make note of any word processing documents you will be using shortly after upgrade. You will want to review these after the upgrade to make sure there are no formatting edits necessary.
- If you are using our Integrated Credit Card processing feature, please verify that you are using EMV compliant devices. You must be EMV compliant before upgrading. Please contact OpenEdge at 1-888-560-0975 if you have questions about compliance.
- If you are using our faxing service, please note that support for our faxing service is not available with DVMAX v8.8. Faxing service in all other DVMAX versions ends in June. If you are using our faxing service and have not yet been contacted by your DVMAX Account Manager, please reach out at 800-877-9221 ext 1.
(The full checklist can be found here - Pre-Install Checklist for Upgrading to DVMAX v8.8)
Please note: This upgrade requires the DVMAX application to be actively running for at least 4-hours following the initial upgrade before restarting. (You may use the application during this time while an update is happening to your word processing documents).
Review System Requirements before proceeding: System Requirements for the Current DVMAX Release
![]() (Support for Mac OS 10.10.x-10.11.x and Windows XP/Vista/Windows 7 and 32-bit Windows 10 has ended!)
(Support for Mac OS 10.10.x-10.11.x and Windows XP/Vista/Windows 7 and 32-bit Windows 10 has ended!) ![]()
![]() (Support for Macintosh computers manufactured in 2007 or earlier has ended!)
(Support for Macintosh computers manufactured in 2007 or earlier has ended!) ![]()
Before you begin:
Contact DVMAX Technical Support at 800-950-5455 for a link to the installer
Step 1: Export Users and Passwords
- Login to DVMAX Single User as the Administrator user.
- From the Section menu, select General Management.
- The General Management dialog opens. Click the Utilities tab.
- Select the Set Passwords & Users and click OK. The Tool Box opens.
- Click the Groups icon on the left side of the window to change to the Groups view.
- Click on the Gear icon at the bottom right and choose Save Users and Groups.
- The Save As dialog will open.
- Select your Desktop, name the file passwords8 and click Save.
- Close the Tool Box by clicking X in the window title bar.
- Close the DVMAX. From the DVMAX menu, select Quit.
Step 2: Backup your DVMAX Data.
- Quit DVMAX Single User.
- Copy your datafile to a different folder, either on your computer or onto a USB device, typically located in:
Macintosh: Macintosh HD:DVMAXDatabaseFiles:DVMAXDataFolder
Windows: C:/DVMAXDatabaseFiles/DVMAXDataFolder/
Step 3: Uninstall Existing DVMAX Software
Windows:
- Go to Start -> Control Panel -> Add/Remove Programs or Programs and Features
- Highlight DVMAX in the list and click Uninstall/Remove
- Verify no residual files exist:
- Navigate to C:/Program Files (x86)/
- Locate the DVMAXProgramFiles75 (could be named DVMAXPratice) folder (if it exists) and delete it.
Macintosh:
- Browse to your Applications folder.
- Click and Drag your DVMAXProgramFiles75 (could be named DVMAXPratice) folder to the trash.
Step 4: Install DVMAX 8.8 Software.
- Locate the DVMAX 8.8 Installer (Contact DVMAX Technical Support at 800-950-5455 for a link to the installer)
- If you receive any errors during the installation process on Windows, cancel the install and right click the installer, then choose Run as Administrator.
- Follow the Installer prompts, and be sure to install DVMAX Single User.
Windows Only:
If the PDFCreator has not been installed at a previous upgrade, install this application now.
Get the latest PDCreator installer here:
http://dvmax.com/UserDownloads/Drivers/PDFCreator-1_7_3_setup.exe
Run the downloaded PDFCreator-setup.exe file and follow the prompts to install the program. NOTE: Click Cancel on the "Please wait while we install PDF Creator" window. See full instructions here: Installing PDF Creator 1.7.3
Step 5: Launch DVMAX Single User
- Double click DVMAX Single User on the Desktop.
- At the first prompt, click OPEN to select a datafile.
- Point DVMAX to your datafile and click Open.
Typical Path on Windows: C:DVMAXDatabaseFiles:DVMAXDataFolder, or D:DVMAXDatabaseFiles:DVMAXDataFolder
Typical Path on Macintosh: Documents:DVMAXDatabaseFiles:DVMAXDataFolder or MacintoshHD:DVMAXDatabaseFiles:DVMAXDataFolder
- The new DVMAX Single User application will open and the data upgrade process will begin.
* This step could take less than hour in most cases *
Step 6: Import Passwords
- Login to DVMAX Client as the Administrator user (password will be blank) if you have not done so already.
- From the Section menu, select General Management. The Management Functions dialog opens.
- Click the Utilities tab.
- Select Set Passwords & Users and click OK.
- After selecting Set Passwords and Users, you will see the following alert:
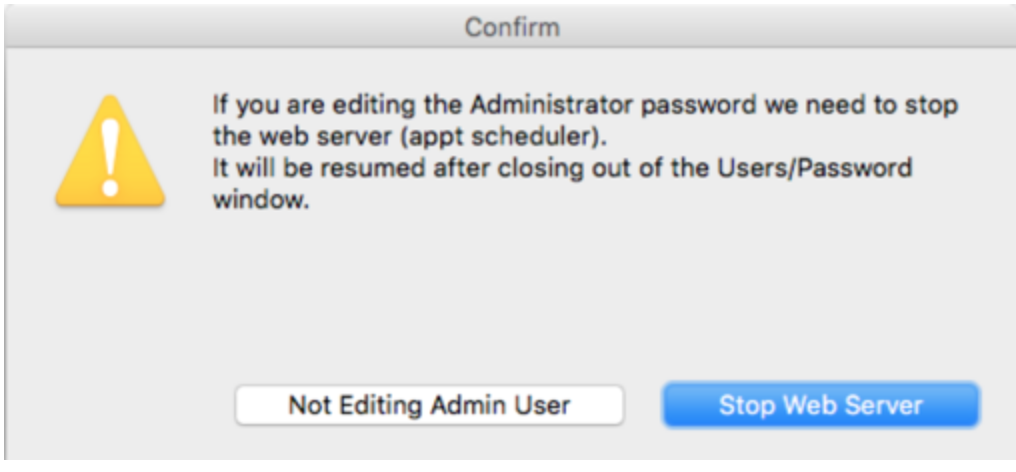
- You will be editing the Admin user so click, Stop Web Server. The web server will be restarted when closing out of the Users/Password window.
- The Tool Box opens.
- Click the Groups icon on the left side of the window to change to the Groups view.
- Click on the Gear icon at the bottom right and choose Load Users and Passwords.
- Click Desktop and select the Passwords8 file you saved before beginning your upgrade and click Open. Users and Passwords are loaded.
- Click the Users icon on the left side of the screen.
- If desired, select the Administrator user and click Edit to set a password for this user.
- Enter the desired password, confirm the password, and click Change.
- Click the X in the window title bar to close the Tool Box.
- Quit DVMAX and restart the application before proceeding
Step 7: Enable Replication Setting (If using Remote Processing Feature)
*Note: You must also call Technical Support to schedule the upgrade of your remote terminals.
- Log into DVMAX Client as Administrator
- Click Section → Hold SHIFT → Click System Constants.
- At the prompt, click I Understand
- Click on the Functions tab
- Click Execute method and type: rp_InitializeTables
- Click OK.
- The program will enable REPLICATE as needed. It will take roughly 5-15 minutes, depending on the size of the data and the speed of the machine.
- When the process is done, the progress dialog will disappear, and you will be able to close out of Advanced Settings.
- No reboot of DVMAX is necessary.
Step 8: Begin the Word Processing Upgrade Process
- Log into DVMAX Client as Administrator
- Click Section → Hold SHIFT → Click System Constants.
- At the prompt, click I Understand
- Click on the Functions tab
- Click Execute method and type: wpro_startWPconversion
- Click OK.
- The program will begin the word processing upgrade process. IMPORTANT: The application cannot be restarted until this process has completed.
- DVMAX Support Technicians: The remote terminals can only be upgraded after this process has completed. When the process is done, the kv setting
Step 9: Verify Lab Setting (If using IDEXX Reference Lab)
- Login to DVMAX Client as the Administrator user if you have not done so already.
- From the File menu, select Preferences. The DVMAX Preferences dialog opens.
- Click on Lab Result Setup
- If the Use VC Agent Radio button is selected, choose Use VC4 Lab Services
- If Use VC4 Lab Services is already selected, no further changes need to be made
- Click OK to close the DVMAX Preferences window.
Step 10: Toss Browser Cache
![]() (Steps may vary based on version of the web browser)
(Steps may vary based on version of the web browser) ![]()
Firefox
- In the top right corner, click the button with 3 horizontal lines, Click on History, then select Clear Recent History.
- Change the Time range to Everything.
- Click the Details Arrow and ensure Cache is checked.
- Click Clear Now.
Safari
- From the Safari drop down menu choose Reset Safari or Empty Cache.
- Ensure all settings are selected and click Empty or Reset.
Chrome
- In the top right corner, click the button with 3 horizontal lines, then choose Settings.
- Scroll to the bottom and click the link "Show advanced Settings"
- A section labeled "Privacy" will appear. Click the Clear browsing data button
- Make sure you have set "Obliterate the following items from:" to "the beginning of time".
- Ensure empty the cache is selected.
- Click Clear browsing data.
Internet Explorer
- Click the Gear Icon or Tools menu, then choose Internet Options.
- In the Browsing History section, click the Delete button.
- Ensure the Temporary Internet files and Cookies and website Data are checked.
- Click the Delete button.
NOTE: If you are using the DVMAX Data Backup and Recovery service, please contact DVMAX Technical Support (800-950-5455) for final configuration of this service after your upgrade.
Step 11: Email Support
Please email our support team at DVMAXSupport@idexx.com to let us know the upgrade was successful. We will update our records as soon as we have been notified that you've upgraded.